
A grey essentials tracksuit has become a wardrobe staple for anyone who values comfort and style. Its neutral shade makes it versatile, and it can be dressed up or down depending on the occasion.
Whether you're heading to the gym, running errands, or just lounging at home, a grey essentials tracksuit fits perfectly into any casual or semi-casual outfit.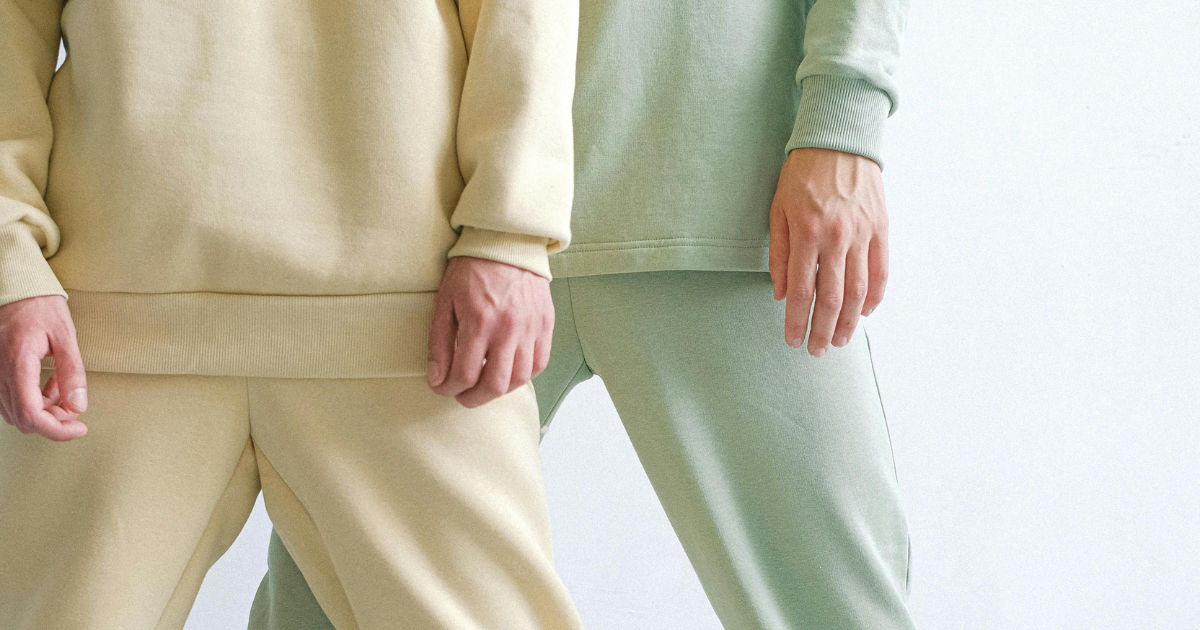
But one question many people face is: what colors match a grey essentials tracksuit? In this guide, we will explore everything you need to know to pair your tracksuit with the right colors, shoes, and accessories to create stylish and cohesive looks.
Grey is often considered the ultimate neutral color.
It sits perfectly between black and white, giving it the unique advantage of working well with a wide range of colors. Unlike bold shades that can clash if paired incorrectly, grey provides a balanced canvas that allows you to play with other colors without looking overdone.
This makes a grey essentials tracksuit an essential piece for anyone looking to build a flexible and stylish wardrobe.
Grey and Its Shades
Before we dive into matching colors, it’s important to understand that grey comes in many shades. There’s light grey, charcoal grey, ash grey, and even greys with a blue or brown undertone. The exact shade of your grey essentials tracksuit can subtly influence which colors look best with it.
Light grey tracksuits are softer and often appear more casual. They are perfect for pairing with pastel colors or bright accents. On the other hand, darker grey or charcoal tracksuits create a more grounded look and can be combined with muted tones, earthy colors, or even bold colors for contrast. Knowing the undertone of your grey essentials tracksuit—whether cool, neutral, or warm—will help you make smarter choices when pairing other pieces.
Colors That Pair Well With Grey Essentials Tracksuit
White
White is a classic match for grey. A grey essentials tracksuit paired with white sneakers or a white t-shirt creates a clean and crisp look. The contrast between grey and white is subtle yet striking, making your outfit appear effortlessly stylish.
You can also add white accessories like a cap or backpack to enhance the outfit. White works with any shade of grey, but it particularly complements light grey tracksuits by keeping the outfit fresh and airy.
Black
Black is another versatile option that pairs beautifully with a grey essentials tracksuit. The combination of grey and black creates a sleek, modern look. Black shoes, jackets, or hoodies can add depth and a slightly edgier feel to the outfit.
For those who prefer a monochromatic look, black provides a sharp contrast without overwhelming the subtlety of grey. This pairing is ideal for evening outings or casual streetwear looks.
Navy Blue
Navy blue is an understated color that works well with grey. It adds a touch of sophistication without being too flashy. For example, pairing a grey essentials tracksuit with navy sneakers or a navy jacket can give your outfit a polished, athletic vibe.
Navy blue is particularly effective with darker grey shades. The deep tones create a harmonious color palette that feels refined and intentional.
Pastel Colors
Pastels like baby blue, soft pink, lavender, or mint green bring a gentle pop of color to a grey essentials tracksuit. These shades are light and subtle, which prevents them from clashing with grey.
A pastel hoodie under your tracksuit jacket, or pastel sneakers, can add a playful and fresh vibe to your outfit. Pastels work best with light grey tracksuits because they enhance the soft and casual appearance.
Bright Colors
For those who like bold fashion statements, bright colors such as red, yellow, or orange can work with grey as well. Grey acts as a neutral backdrop, allowing these colors to stand out without overwhelming your look.
A grey essentials tracksuit with bright sneakers or a colorful backpack can create a fun, sporty aesthetic. When using bright colors, it’s best to choose one accent color rather than multiple, so the outfit remains cohesive.
Earthy Tones
Earthy tones like olive green, beige, camel, or brown are excellent choices for pairing with grey. These colors bring warmth and depth to your outfit and are perfect for casual streetwear or outdoor looks.
For instance, a grey essentials tracksuit with beige sneakers or a brown bomber jacket gives a natural, grounded appearance. Earthy tones often pair better with mid to dark grey tracksuits because they complement the depth of the shade.
Grey on Grey
Yes, you can also go monochromatic with a grey essentials tracksuit. Pairing different shades of grey together creates a minimalist and modern look. For example, light grey tracksuit with dark grey sneakers or a charcoal hoodie works perfectly.
The key to grey-on-grey outfits is to mix shades and textures. Different greys in your outfit prevent it from looking flat and make the ensemble appear thoughtfully put together.
Matching Shoes With Grey Essentials Tracksuit
Shoes play a vital role in completing your tracksuit look. Since a grey essentials tracksuit is neutral, it allows you to experiment with different types of shoes.
White Sneakers
White sneakers are the go-to choice for grey tracksuits. They maintain a clean and fresh aesthetic, perfect for casual outings or streetwear looks.
Black Sneakers or Boots
For a more urban or edgy style, black sneakers or boots complement grey tracksuits well. This combination works especially well for darker grey tracksuits.
Colorful Sneakers
Bright or pastel sneakers can be used to create a statement. For instance, red, yellow, or neon sneakers paired with grey tracksuits instantly draw attention to your footwear.
Earth-Toned Shoes
Brown, tan, or olive sneakers or boots match grey tracksuits effortlessly. Earth tones help achieve a grounded, cohesive look, especially with casual or outdoor outfits.
Accessories to Pair With Grey Essentials Tracksuit
Accessories can elevate a simple grey essentials tracksuit from basic to stylish.
Hats and Caps
Neutral caps in black, white, or grey work well. You can also experiment with pastel or bright caps to add color.
Bags and Backpacks
A minimalist black backpack or white tote can complement grey tracksuits. For streetwear vibes, try bold or patterned bags.
Watches and Jewelry
Silver or black watches pair seamlessly with grey tracksuits. Minimalist jewelry, like a chain or bracelet, adds subtle sophistication.
Jackets
Layering with jackets can enhance your tracksuit outfit. Denim jackets, bomber jackets, or leather jackets in black, navy, or earthy tones pair well.
Seasonal Color Pairing Tips
Spring
During spring, pastel shades and light neutrals complement grey tracksuits beautifully. Soft blues, pinks, and mint greens give a fresh and lively appearance.
Summer
Summer looks benefit from bright and bold accents. Vibrant sneakers or colorful t-shirts under your grey essentials tracksuit bring energy to your outfit.
Autumn
Autumn favors earthy tones like olive, camel, and brown. These colors paired with grey tracksuits create a warm and grounded aesthetic.
Winter
Winter outfits can lean on monochromatic styles or darker shades like black, navy, or charcoal. Layering with coats, scarves, and boots enhances the cozy winter look.
Layering Ideas With Grey Essentials Tracksuit
Layering is a practical and stylish way to wear your grey essentials tracksuit.
-
T-shirts: Add a bright or pastel t-shirt under your tracksuit for a pop of color.
-
Hoodies: A black or navy hoodie under your tracksuit jacket creates depth.
-
Jackets: Denim or leather jackets work well for urban or streetwear looks.
-
Vests: For sporty aesthetics, consider adding puffer or quilted vests in neutral or bold colors.
Matching Grey Essentials Tracksuit With Bottoms
While tracksuits usually come as a set, mixing bottoms with your grey essentials tracksuit can be a creative styling choice.
-
Jeans: Dark or light denim jeans can replace the track pants for a semi-casual look.
-
Shorts: Neutral or bright shorts work for summer days.
-
Joggers: Grey tracksuit bottoms can be paired with white or black joggers to create a layered sporty look.
Color Matching Mistakes to Avoid
While grey is versatile, there are a few mistakes to avoid:
-
Too Many Bright Colors: Pairing multiple bright shades can make your outfit look chaotic. Stick to one accent color.
-
Clashing Undertones: Ensure your grey tracksuit’s undertone complements other colors. Warm greys work with earthy tones, while cool greys pair with pastels or blues.
-
Ignoring Texture: Mixing textures adds depth, but mismatched textures can make your outfit look sloppy.
Styling Tips for Grey Essentials Tracksuit
-
Accessorize thoughtfully: Hats, watches, and bags can add personality.
-
Layer for dimension: Jackets, hoodies, and vests can enhance style.
-
Play with shades: Different shades of grey or contrasting colors add interest.
-
Keep shoes in mind: Footwear can make or break the outfit’s look.
-
Stick to simple accents: Grey tracksuits look best when not over-accessorized.
Grey Essentials Tracksuit in Everyday Life
A grey essentials tracksuit is perfect for many occasions:
-
Casual Outings: Coffee runs, grocery shopping, or walks in the park.
-
Travel: Comfortable yet stylish for airports or long drives.
-
Gym or Sports: Functional and stylish for workouts.
-
Lounge Wear: Perfect for staying comfortable at home without sacrificing style.
Because of its versatility, investing in a high-quality grey essentials tracksuit ensures you have a reliable base for countless outfit combinations.
Conclusion
Pairing a grey essentials tracksuit with the right colors can elevate your style and make everyday outfits look intentional and fashionable. White, black, navy, pastels, bright shades, and earthy tones are all excellent options depending on the mood and season. Accessories, shoes, and layering pieces further enhance the versatility of a grey tracksuit, allowing you to create looks that are sporty, casual, urban, or even semi-formal.
Remember, grey acts as a neutral canvas that allows creativity with colors and textures. By understanding shades, matching appropriately, and avoiding common mistakes, you can confidently style your grey essentials tracksuit for any occasion. Its adaptability and comfort make it an indispensable piece in modern wardrobes.
A well-styled grey essentials tracksuit not only provides comfort but also demonstrates effortless fashion sense. Experiment with colors, have fun with layers, and don’t be afraid to incorporate subtle pops of color or texture. With the tips provided in this guide, your grey essentials tracksuit will never be boring—it will always be a foundation for stylish, versatile, and modern outfits.